 Marblo
Download, install & first launch
First, download and install the Marblo desktop app. macOS and Windows are supported; after first launch, click the install button to install the agent CLIs you need in one pass.
Get the app from the download page
On the download page, grab the latest build for your operating system (macOS or Windows). Apple Silicon and Intel Macs, and Windows 10/11, are supported.
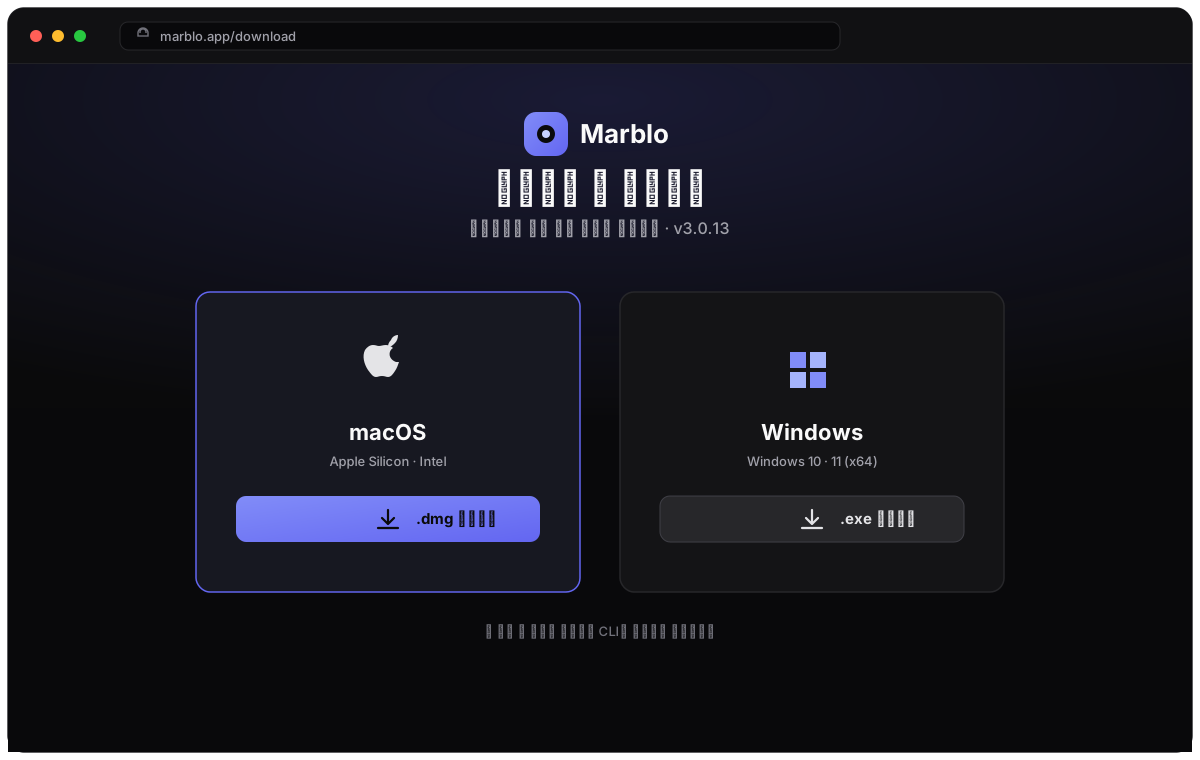
Install and launch for the first time
Run the installer you downloaded. On macOS, open the .dmg and drag Marblo into your Applications folder; on Windows, follow the installer prompts.
On first launch you may see a macOS Gatekeeper or Windows SmartScreen warning. On macOS, choose 'Open Anyway' under System Settings > Privacy & Security; on Windows, choose 'More info > Run anyway'. The builds are properly signed.
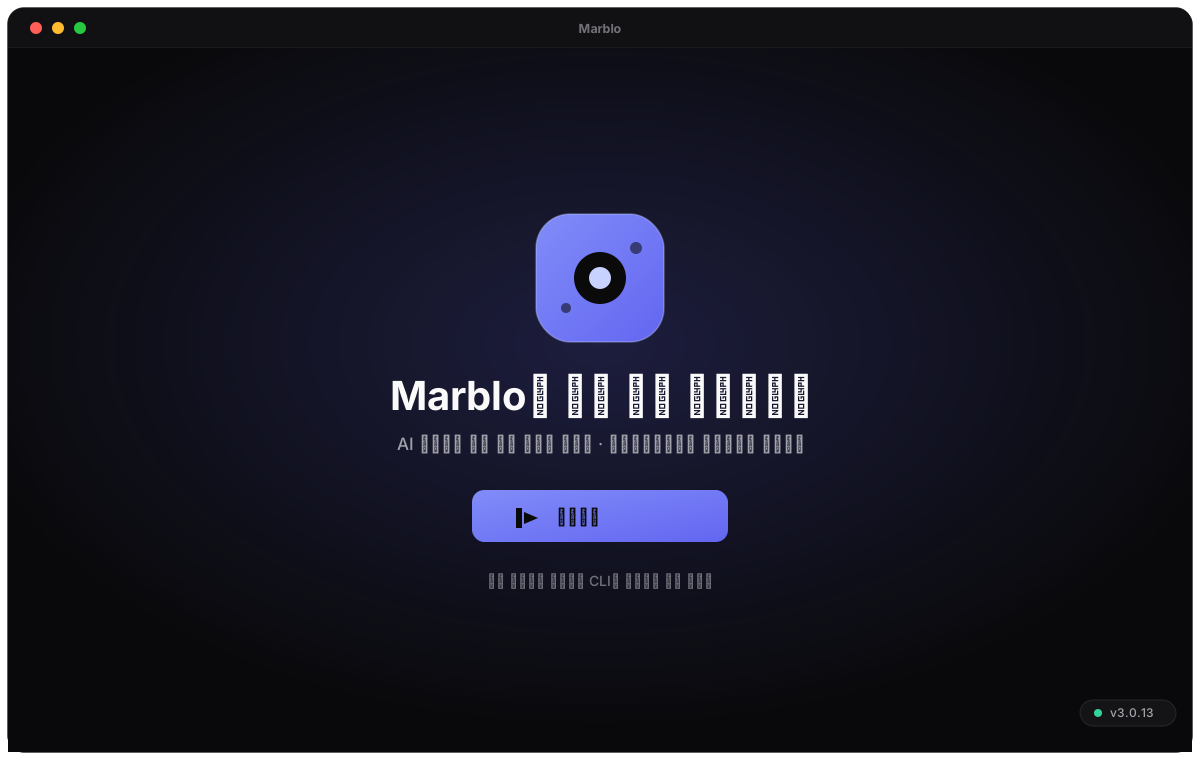
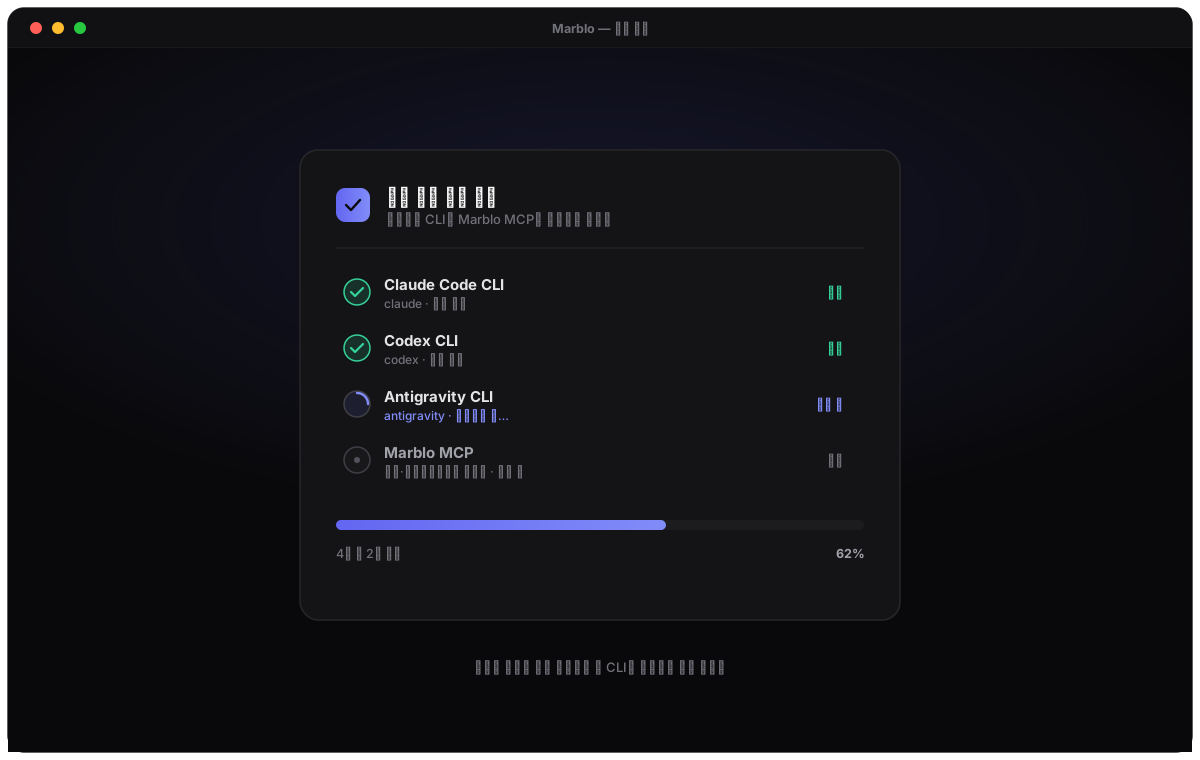
One-click install for required CLIs & Marblo MCP
After first launch, click the install button and Marblo installs the required agent CLIs (Claude Code · Codex · Antigravity) and the Marblo MCP in one pass. When installation finishes, log in to the CLIs in the next step.
After one-click install, the next step is to log in (authenticate) to each CLI, and you're ready to go.
Authenticate the CLIs (log in)
After one-click install, your setup task is to log in (authenticate) to each CLI.
Log in to Claude Code
Run the command below in a terminal and follow the prompt to sign in with your Anthropic account in the browser.
claude loginLog in to Codex
Log in to Codex the same way, authenticating with your OpenAI account.
codex loginAuthenticate Antigravity
Authenticate Antigravity as well. Follow the sign-in prompt that appears the first time you use it to log in with your account.
You only need to authenticate the CLIs you'll actually use. To run multiple agents at once, authenticate all of them.
Connect a model with BYOM
There are two ways to connect models: sign in to a native CLI account, or add a vendor key through Bring Your Own Model (BYOM). With a vendor key, agents boot against that model instead of a native CLI account. Supported choices include GLM, Kimi, MiniMax, and local models through Ollama.
Native CLI authentication and BYOM are separate paths. Use the native CLI login for Claude Code, Codex, or Antigravity; use BYOM when you want to bring a vendor key or a local Ollama model.
Verify authentication
Once you're signed in, each CLI switches to an authenticated state. If the status doesn't update, try restarting the app.
Credentials are stored locally by each CLI — Marblo never stores your account password or API keys, and everything runs on your own machine.
Pick a folder — project auto-registers
Just pick the code folder you want to work in — with no confirmation step, the project registers automatically and the orchestrator starts alongside it.
Pick a folder = zero-click registration
Select a local folder and Marblo registers it as a project right away. There's no 'Do you want to register?' confirmation click — picking the folder is all it takes. You can switch between registered projects from the sidebar.
A git repository is recommended. Marblo runs multiple agents safely in parallel using isolated git worktrees and tracks changes as diffs.
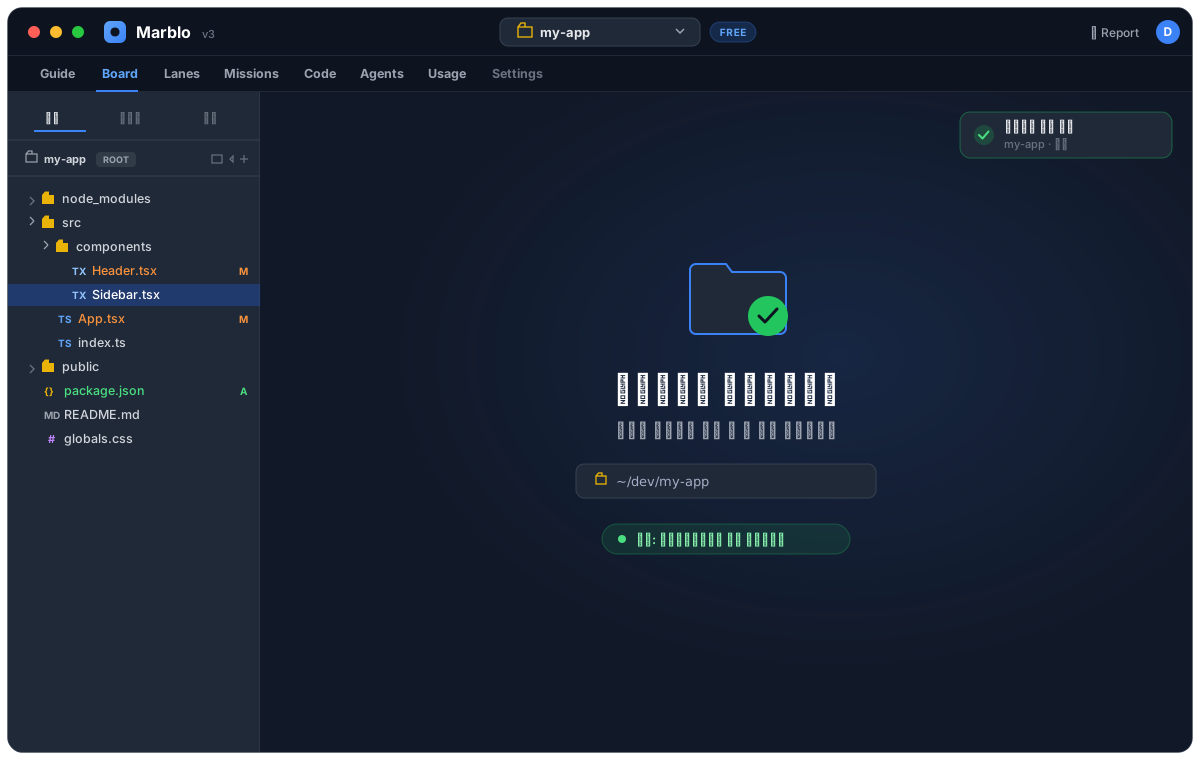
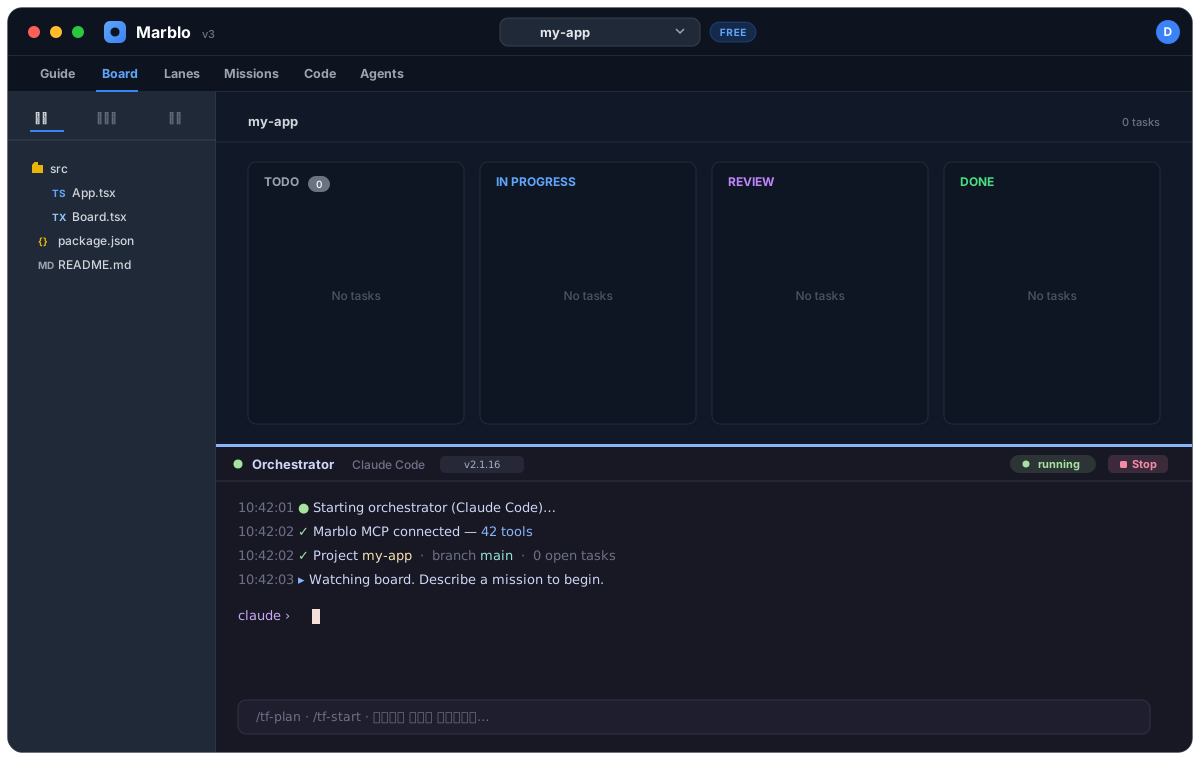
The orchestrator auto-starts
Once the project is registered, the orchestrator starts automatically and opens a dedicated terminal session. It analyzes your request, breaks it into tickets, and spawns agents with an assigned role (frontend, backend, etc.) and model (Claude, GPT/Codex, Antigravity).
We recommend running a small task with a single agent first to get comfortable with the flow, then scaling up to multiple agents at once.
Run your first mission / flow
Now it's time to give real work. Hand your first mission to the orchestrator.
Write a mission
Describe the feature you want to build or the bug you want to fix in plain language to the orchestrator. It breaks this down into tickets on the kanban board.
Run & track progress
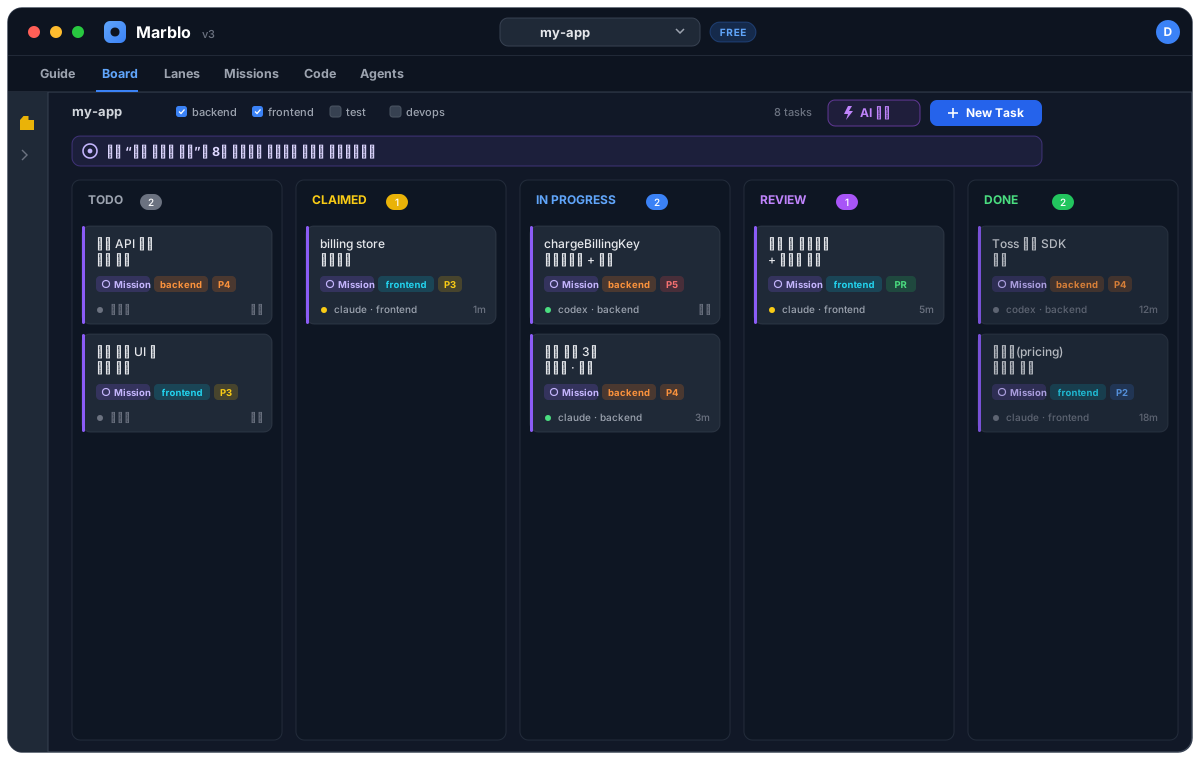
While agents work through tickets in parallel, you can track progress in real time on the kanban board. Each agent's terminal output is available in its own tab.
The review gate
Finished tickets move to the REVIEW state. A human confirms the changes and approves them before they're merged.
Always review the diff before merging an agent's changes. Marblo places a human REVIEW gate before merge so unintended changes don't land automatically.
The orchestrator routes models across the fleet
The orchestrator turns your goal into a ticket graph, then spawns a model suited to each task. It considers task shape, cost, and available quota when selecting models, and diversifies the fleet so the whole mission is not locked to one vendor.
You can follow each ticket's assigned model in the Board and Agents views. The model used for a task can differ from the model running the orchestrator.
Run Quick Lanes in parallel
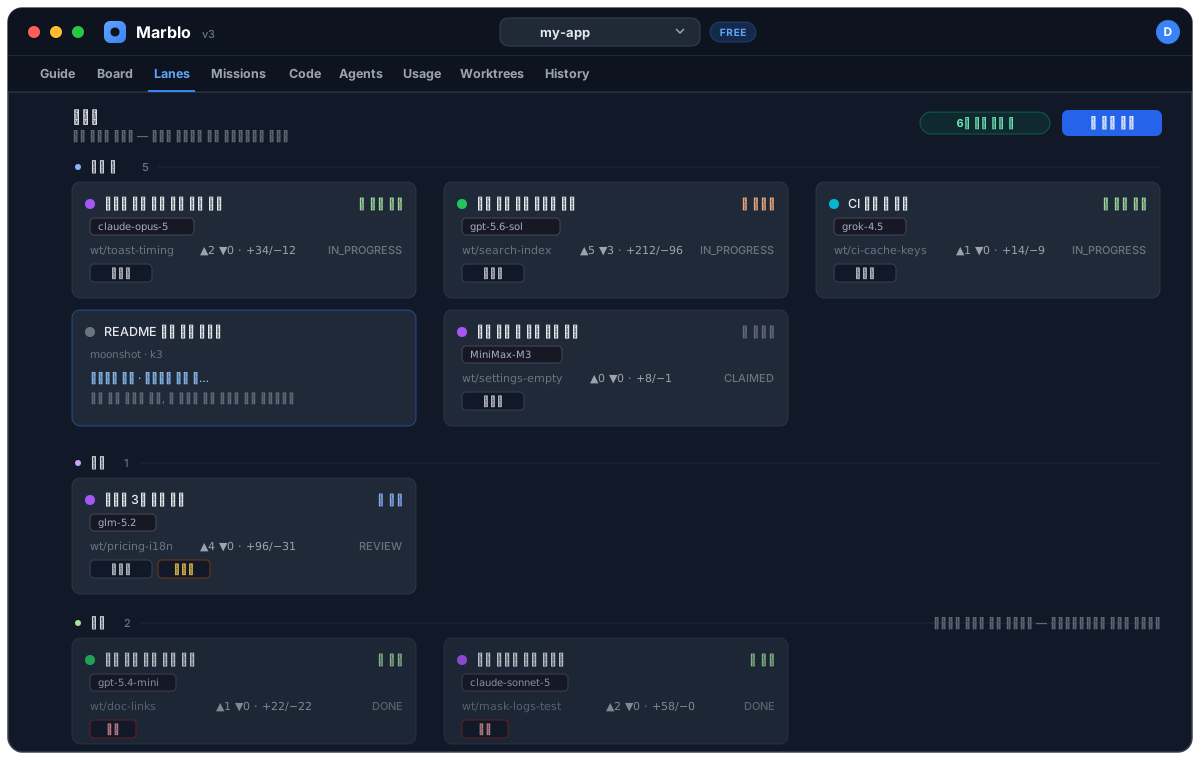
Quick Lanes are the direct, hands-on mode: choose a model yourself and start several agents side by side without going through the orchestrator.
Start a lane directly
Open the Lanes tab, create a lane, describe the work, and start it. Repeat for as many independent tasks as you want; each lane runs alongside the others.
Choose the model for each lane
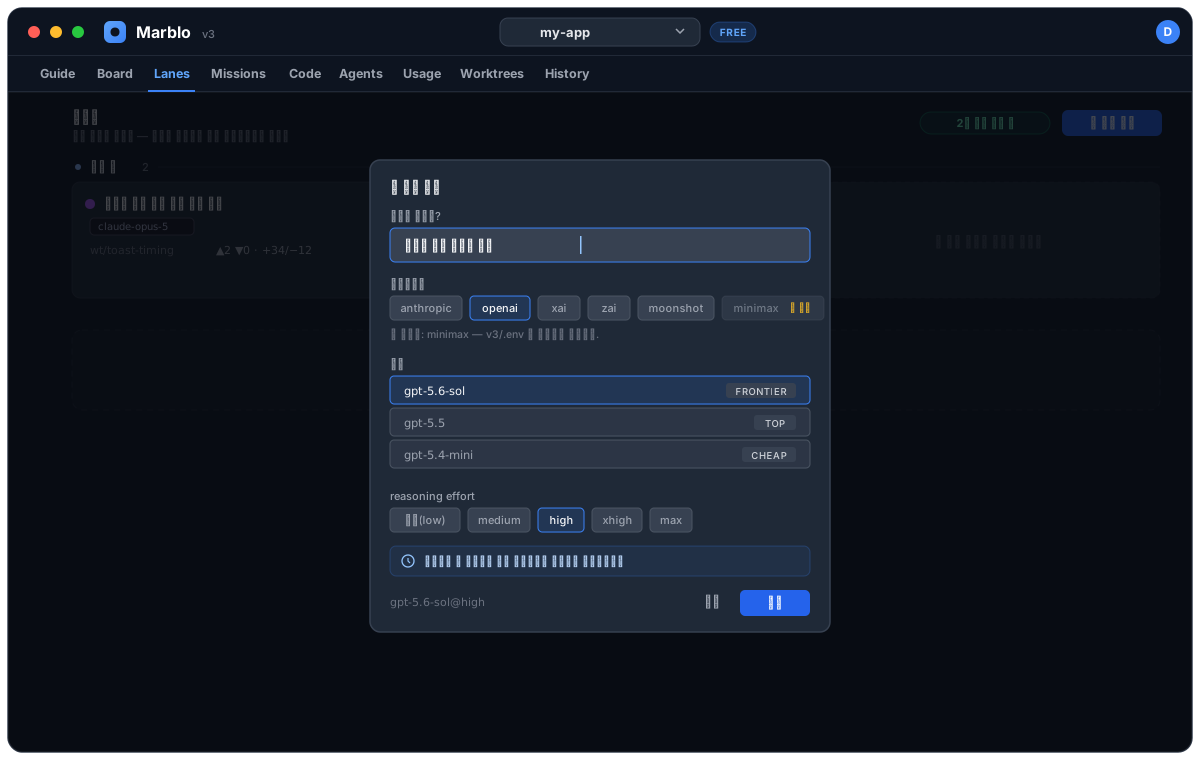
Each lane has its own model selector. Pick the model that fits that task, including a BYOM or local option when it is available in your model registry.
Quick Lanes do not ask the orchestrator to decompose or route the work. You choose the model and the parallel work yourself.
Track lane progress independently
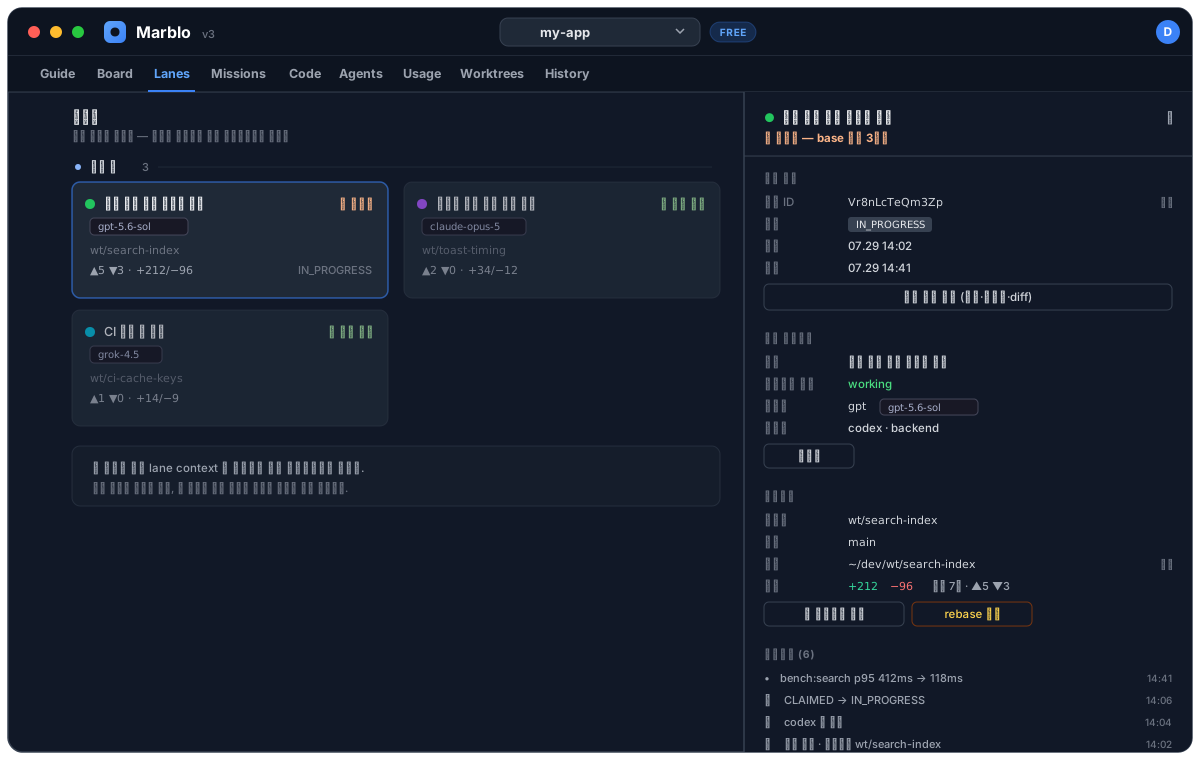
Lane work is tagged with its own lane context and runs in an isolated worktree. Open a lane's terminal or details to follow status, model, worktree state, and restart actions without mixing it with mission tickets.
Explore the workspace tabs
After your first mission, use the workspace tabs to move from planning to live execution, review, and the audit trail. Each tab has one focused job.
Board — see the kanban flow
Board is the kanban view of project tickets. Use it to see what is queued, in progress, in review, or done, and open a ticket to inspect its agent and changes.
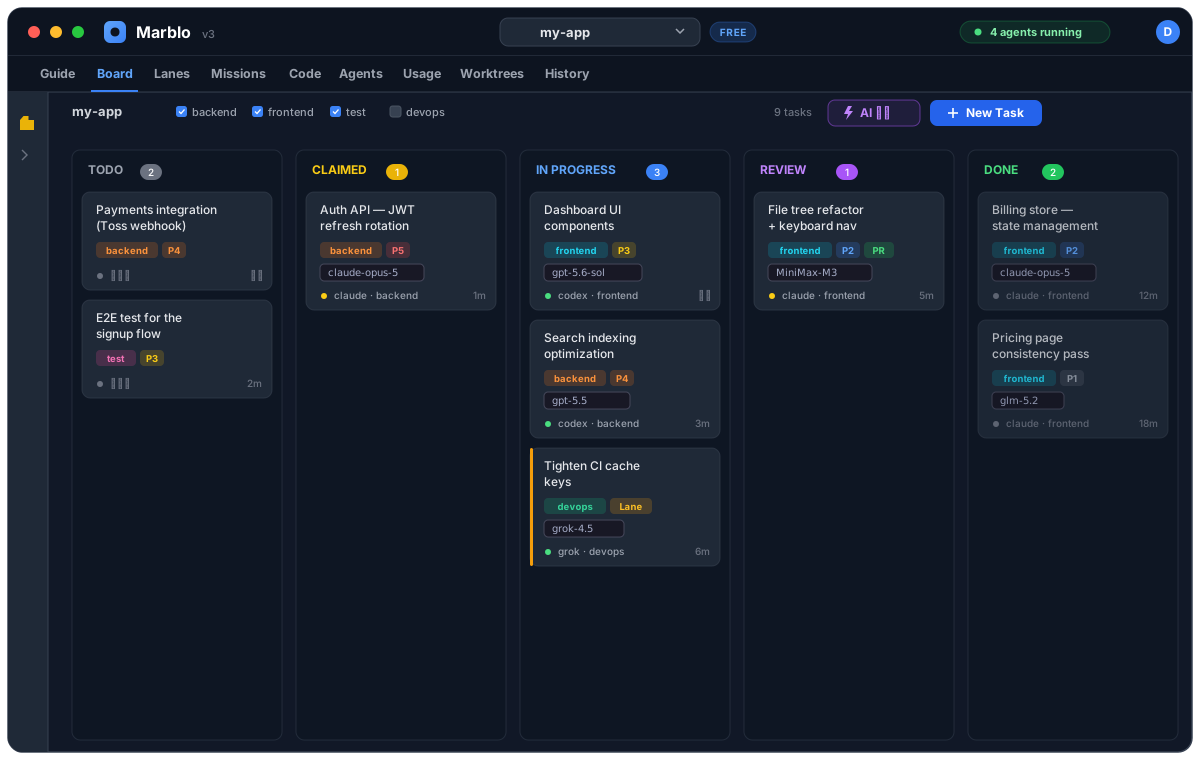
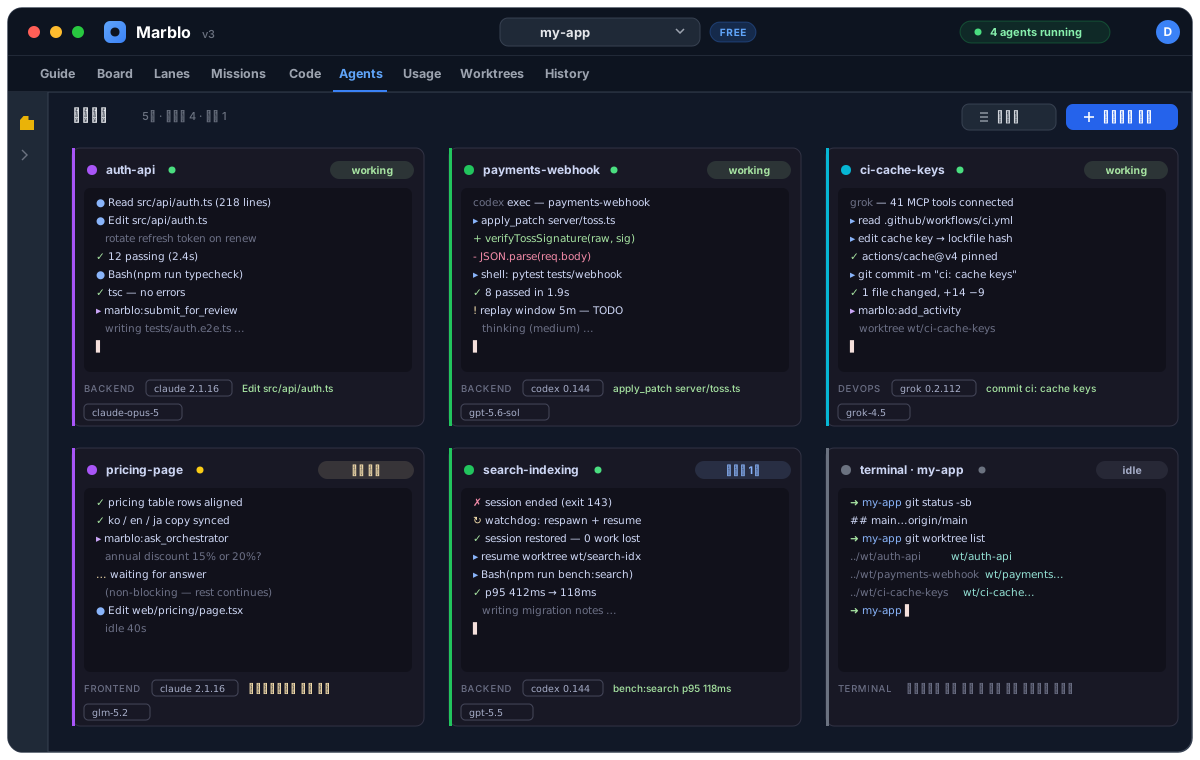
Agents — watch live terminals
Agents gives you a live terminal for each agent and its current status. The agent watchdog can reconnect or self-heal interrupted work, while the panel keeps the latest model and activity visible.
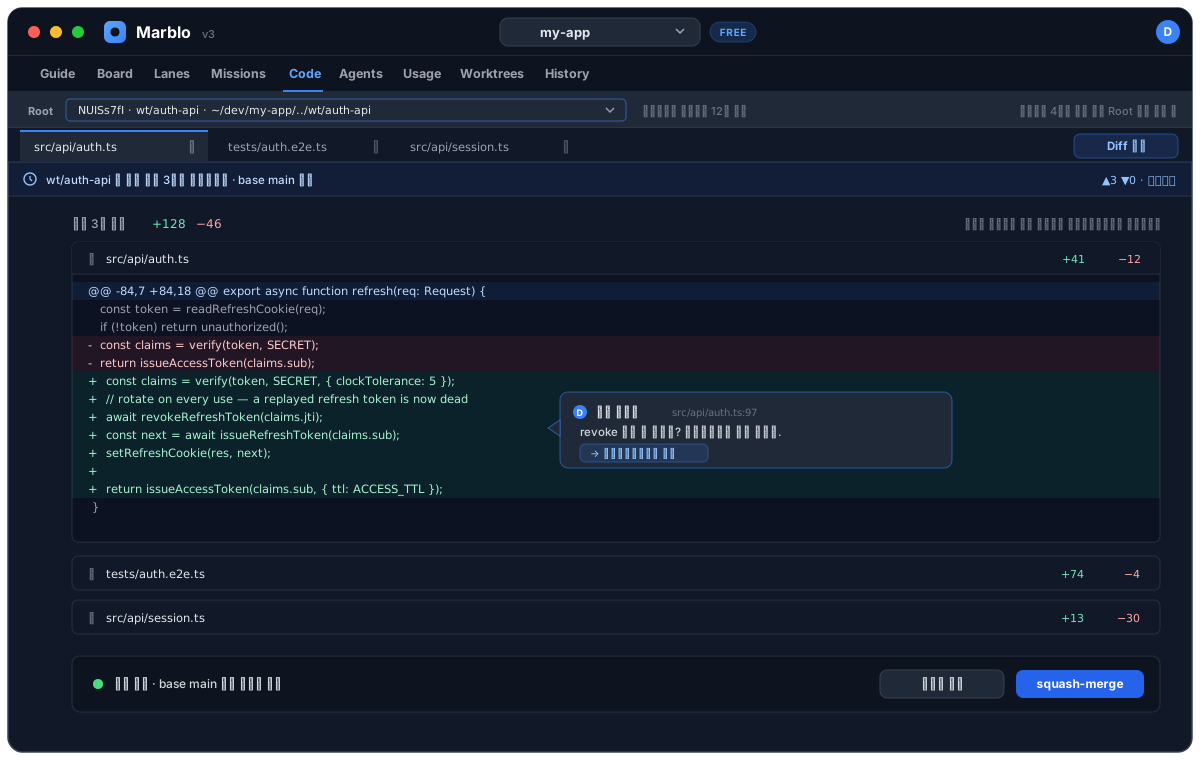
Code — review worktree diffs
Code opens the files and diff for the selected worktree. Use it to inspect the exact changes and leave review feedback before anything is merged.
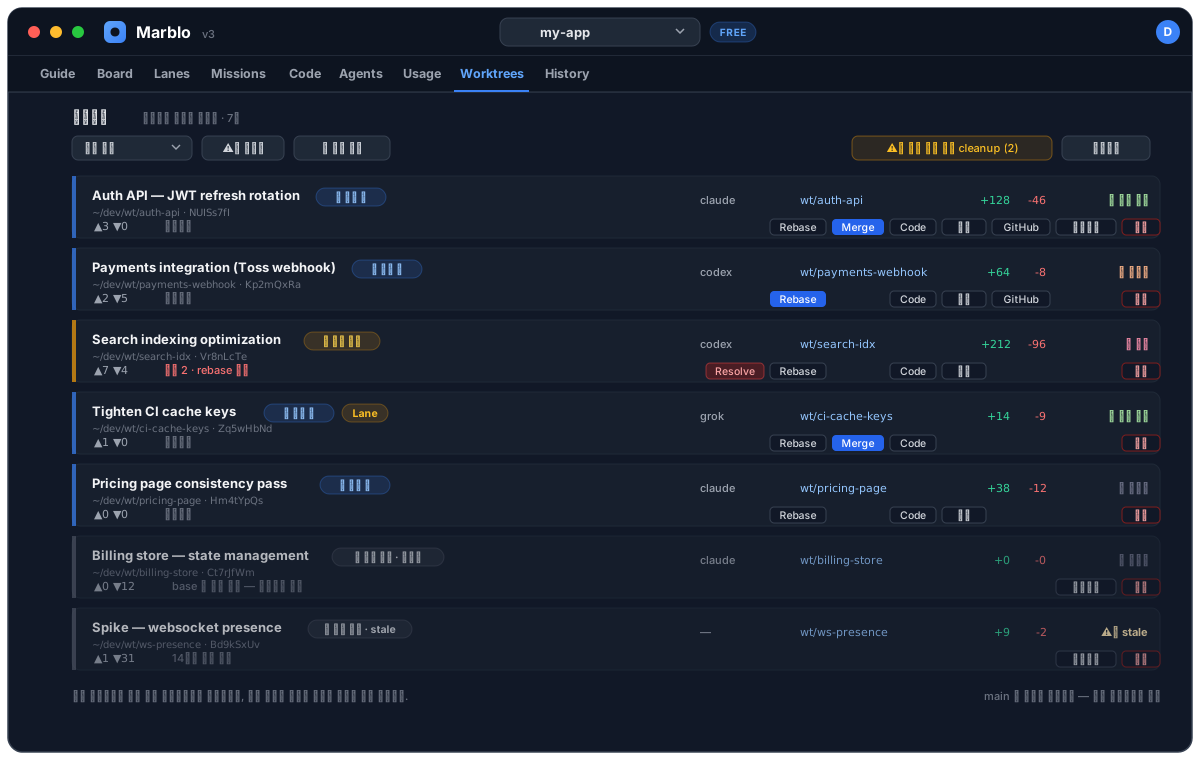
Worktrees — keep tickets isolated
Worktrees shows the isolated branch and filesystem workspace created for each ticket. Parallel agents work in separate worktrees, so unrelated changes do not collide while they are being developed.
Lanes — run direct parallel work
Lanes is the direct parallel mode described above: select a model per lane and run independent agents next to orchestrated mission work.
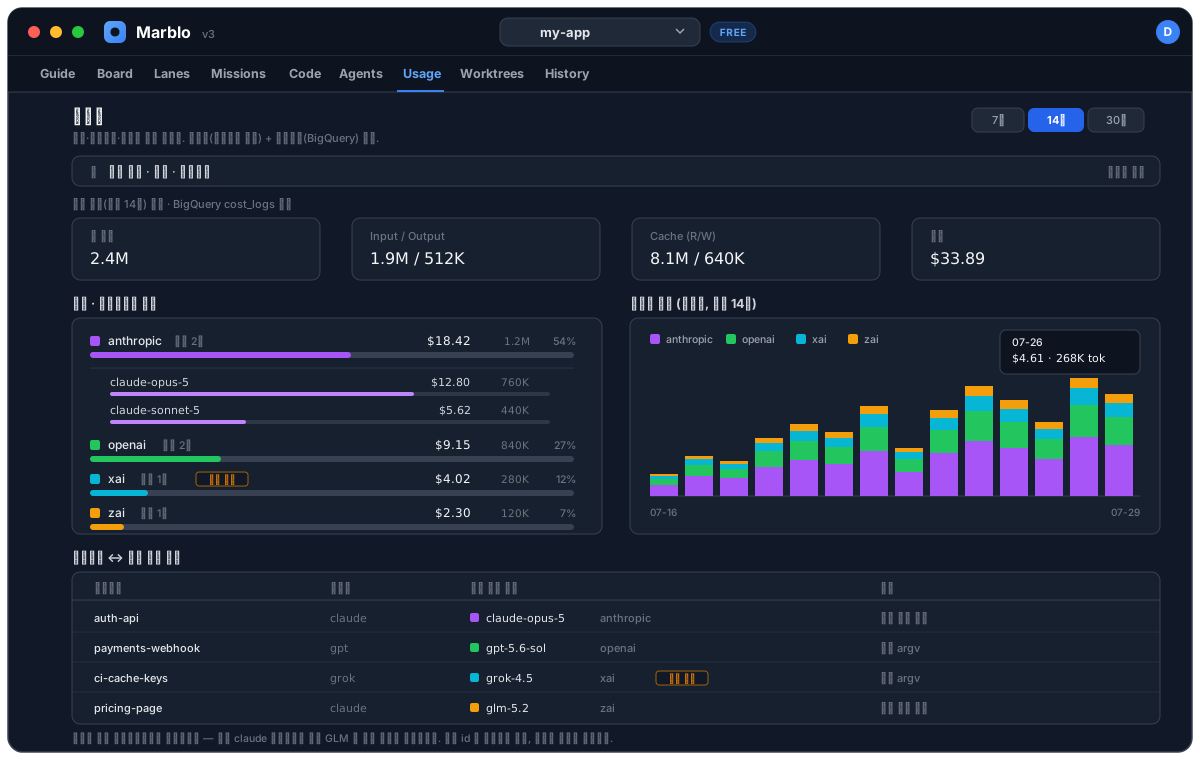
Usage — understand model and daily cost
Usage summarizes agent and model activity over time, including daily cost totals where recorded. Use it to understand which vendors and models are consuming your available budget or quota.
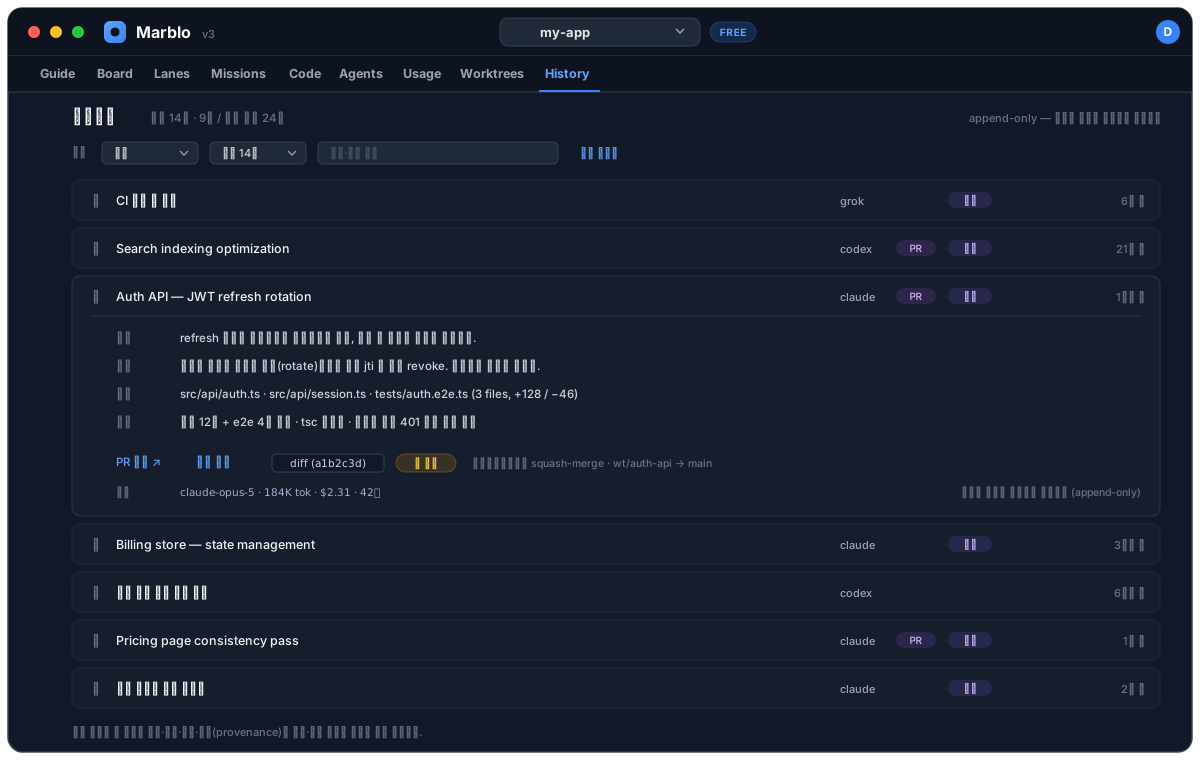
History — keep the append-only record
History is the append-only work ledger: progress, costs, provenance, and merge events stay available after a task completes. Use it to reconstruct what happened and open the related ticket or diff.
Billing & plans
Marblo is free to start, and you can upgrade to Pro when you need more.
Explore the plans
The Free plan gives you the core features at no cost. Pro is a monthly subscription with additional features. See the pricing page for the differences.
Usage fees for the agent CLIs (Claude, Codex, Antigravity) are billed separately to each provider account and are independent of your Marblo subscription.
Manage your subscription
After signing in, view and manage your subscription status and billing history from your account.
FAQ & help
If you get stuck, the resources below can help.
Learn more
Find answers to common questions in the FAQ, and report a bug if something goes wrong. Take a look at the Founder program too.